I am always excited to find a project to work on that involves robotics, and this light following robot was just the ticket.
Sometimes taking time to learn about something new and interesting can really change up your week!
That is what happened to us and we are so glad we gave this project a try.
This post may contain affiliate links which means I may receive a small amount, at no cost to you, if you make a purchase through a link. I was compensated for my work on this post. All opinions are my own and I share things I think would be of interest to boys.
Building Robots
This was the most complex robot that we have built so far and we really enjoyed the challenge.
We have played around with robots for a long time and already have some posts on robots and robotics.
We recently tried out Cubelets, and because we had so much fun with that one, we decided to try something new.
BlueBot 4-in-1 Robotics Kit
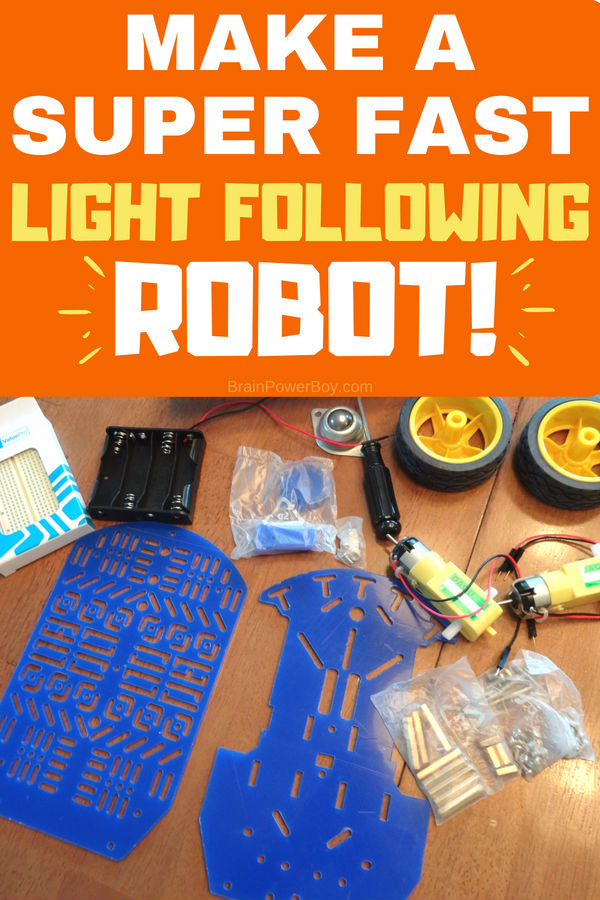
After some discussion we settled on the BlueBot 4-in-1 Robotics Kit from Home Science Tools.
It looked interesting, had more parts than the other robots we had made, and you could make more than one project with the kit. I loved that part.
Shipping was quick which is awesome when you are excited to get started on a project.
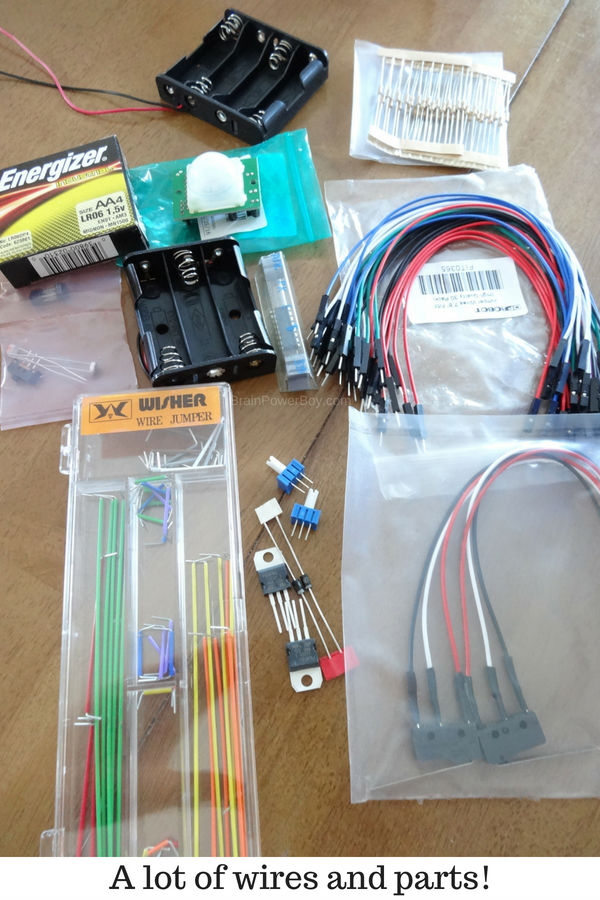
We got the box and opened it up. At first, to be honest, I was a little nervous. There were a lot of parts in the box! A lot of wires and little pieces and a whole lot of screws (more on that later.)
It looked both intriguing and a bit overwhelming at the same time lol.
Plus they mentioned that it would take 3 days to make it. What?! I wasn’t expecting that. I’ll share our experience as we go along and let you know how it all turned out.
NOTE: If you just want to stop reading for now and get an awesome robot science project kit, do the two quick things in the yellow box.
First, click to get a $5.00 a off coupon for new Perks Program sign-ups!
Second, use this link to jump to the set we got to order and/or see additional details.
Getting Ready to Build the Robot
I am a direction reader, but others in my family like to dive right in, so we had to work together to figure out the best way of going about building this science project.
As I said earlier, there are four projects included with this kit. The first thing we had to do was pick our project, which as you can see from the title was a light following robot. They also call these light tracking robots.
There were some directions included in the kit, but not all the directions you need.
We had to go online to see the rest of the directions as they don’t come with the kit. While that was a little odd to me, it was also no big deal.
We printed a pdf that showed the steps for attaching things to the breadboard (<< pop over to that link to see a picture and learn more about them.)
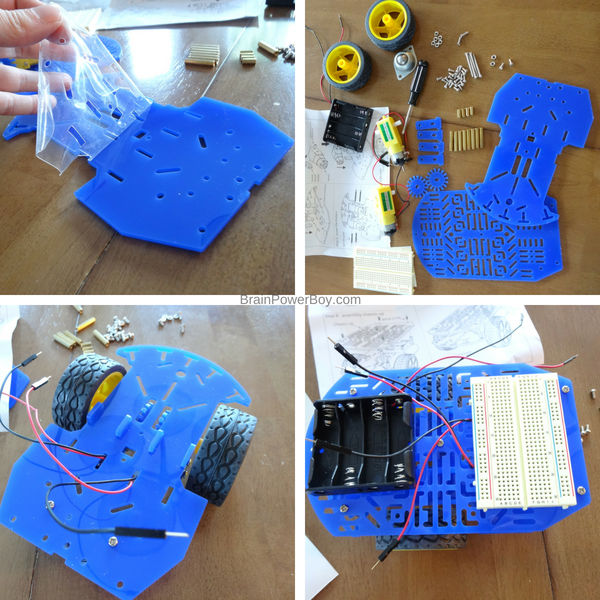
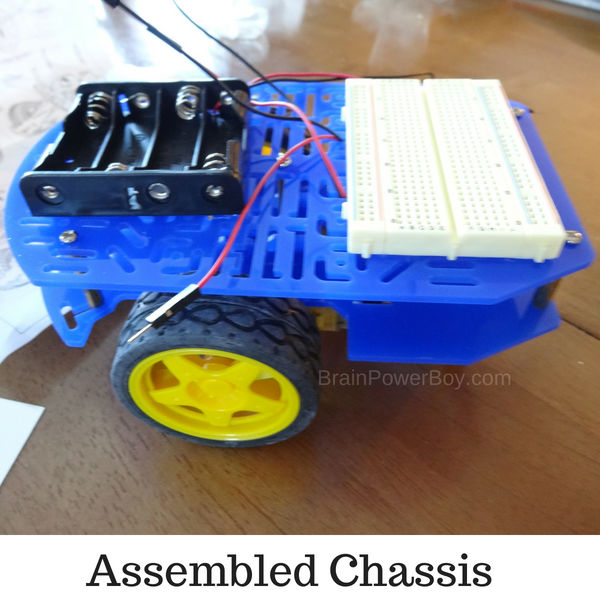
Pictured below is us taking the protective coating off a chassis piece, all the parts for the chassis laid out (see all those screws and bits?,) and two additional images of the assembly process.
Building a Robot Video
We found that there were videos by the kit creator that showed step-by-step construction.
So, we grabbed our tablets, gathered everything up, and got set up at the kitchen table to start building our light following robot!
We started out with the chassis and while I was going to make a video showing you how we built it, they already made one, so here it is. You can see that it isn’t hard at all.
The only thing to watch out for is that the instructions in the kit, and the instructions on the video, had you do two different things! That was a bit confusing.
The instructions with the kit have you putting the battery pack between the two blue plastic pieces and it would be nearly impossible for you to insert the batteries if you did it that way.
However, the directions in the video are correct, so just follow the video instead of the paper instructions.

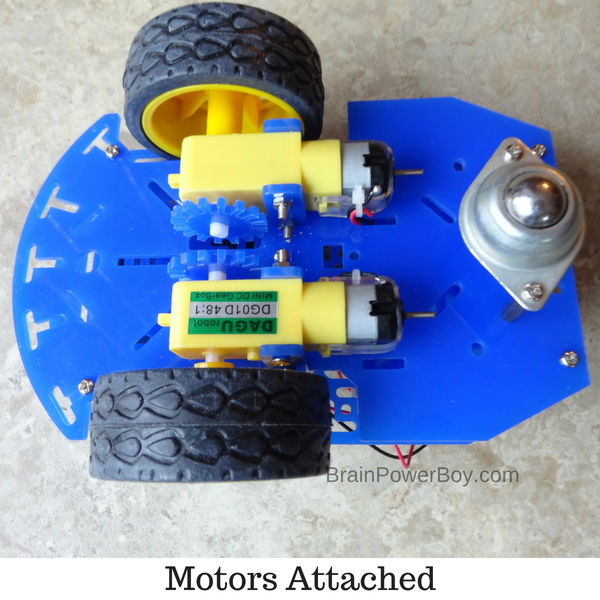
It was actually pretty fun to put together. We didn’t have the issues they had with putting the screws on, we simply slipped the nut on and spun it onto the screw. Then we used the included screwdriver to tighten them up.
One other thing . . . the foam tape you need, didn’t come in the kit.
I know some of you are going to have it, but I didn’t. I made a few phone calls and couldn’t find anyone who had it either.
I didn’t want to buy a whole roll of it because I only needed a couple of little strips.
It would have been nice for them to include that in the kit to be honest, but I just used packing tape and it worked great so no biggie.
Building the Light Following Robot
The directions for building the robot were very easy to follow. But . . . that doesn’t mean we didn’t make a mistake! My mistake at that!
Yup, we had to trace our steps backwards, pull a few things off the breadboard and make some adjustments before we got it to work correctly.
This robot is fast!! I mean really fast. I was shocked at how quick it went as all of the other robots we have worked with went along fine but were rather slow.
I guess because it is bigger, has bigger wheels, and a larger battery pack than ones we have worked with before it can be pretty darn speedy.
I mention this for two reasons. First, because I set it down, turned it on and it took off and smashed into my woodwork! Yikes.
I thought you may want to be prepared to put it where it won’t run into something and to make sure you don’t have it up on a table when you turn it on. If you did have it on a table, it would fly right off, and let me tell you, it is unlikely you would catch it in time!
Second, because wow, what a lot of fun it is when robots can go so fast. Super impressive!
Completed Robot!
Here it is! Isn’t it awesome?! 🙂
![]()
![]()
Putting it together was a great experience. I am really glad we got this and were able to enjoy adding some robotics to our homeschool this week.
Light Following Robot Video
Here is a video of our light tracking robot.
It was a bit touchy to set up the sensors correctly so it would follow the light, but once we got it, it was a lot of fun to play around with.
Take a moment to watch our short video to see the tracking robot in action!
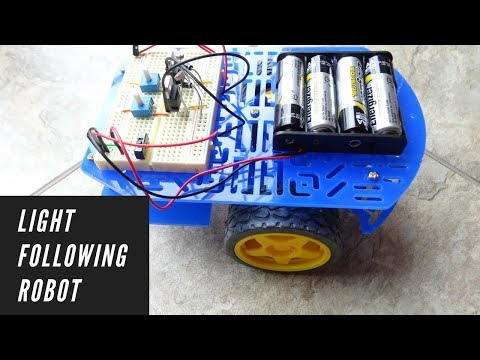
It can go even faster than I had it going but since I was trying to get it to follow the light and wasn’t the best “driver” lol, you can’t really get the whole feel for the speed.
More Hands-on Robot Projects
With this kit, you don’t just get one project. That is why we choose it. You can actually do more!
And that is where some of those extra parts come in.
As I said, when I opened the box I thought, oh boy, there are a lot of wires and stuff in there.
However, we didn’t even use most of it. There are options, lots of options 🙂
The other things you can make are:
A Guard Robot
A guard robot which is a motion sensor robot that moves it something comes near it.
Remember how I told you this thing is fast?!
Well, just imagine activating it by accident and having it spring out at you when you activate its motion sensor.
Kids think this one is extra cool and they like to build it to keep their brothers and sisters (or moms and dads) out of their rooms.
A Line Following Robot
A line following robot which follows a dark line.
We went back and forth about which project to try first, this one or the light following one.
While the light following one ended up being our first choice, this is a super cool project.
I love that you can make a big track to have the robot run on. We are going to do this one next and use unprinted newsprint roll paper to make a huge track to try.
An Obstacle Avoiding Robot
An obstacle avoiding robot is the last project that comes with the kit.
They explained it like an animal who uses its whiskers to find its way around. Isn’t that cool?
When we do this one I think we will make a light weight cover for it and decorate it like an animal.
Conclusion
Those are just the activity ideas that they suggest.
Once you have all the parts and the chassis, you can make as many other things as you like.
This is where the real science comes in as you can get experimenting and trying so many different things and variations of the items you already learned how to make.
Get the kit that we used here!
This is valuable learning at its best. I hope you have a lot of fun with it.
I think this makes an awesome gift for a kid who is interested in robotics.