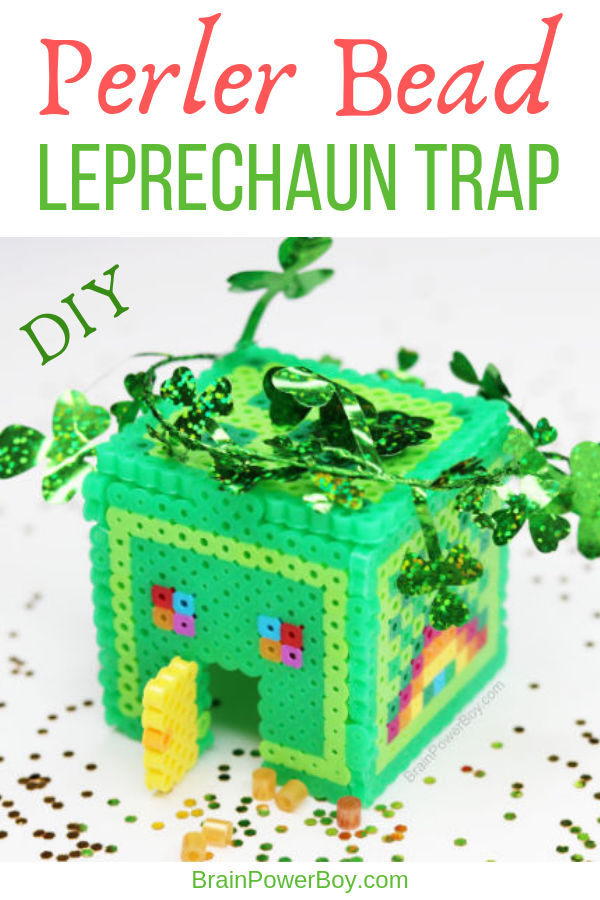
So you want to catch a leprechaun, eh? This year, do it in a fun way by making a 3D perler bead leprechaun trap!
When Saint Patrick’s Day rolls around, we certainly think of leprechaun traps . . . and gold!
We had already made a few LEGO leprechaun traps and we have quite a few perler bead patterns on our site as well, but no trap out of beads so it was easy to decide what to make our trap out of this year.
One thing I really love about beads is that they are so fun to design with. I had never made a 3D perler project before but it was pretty easy to figure out.
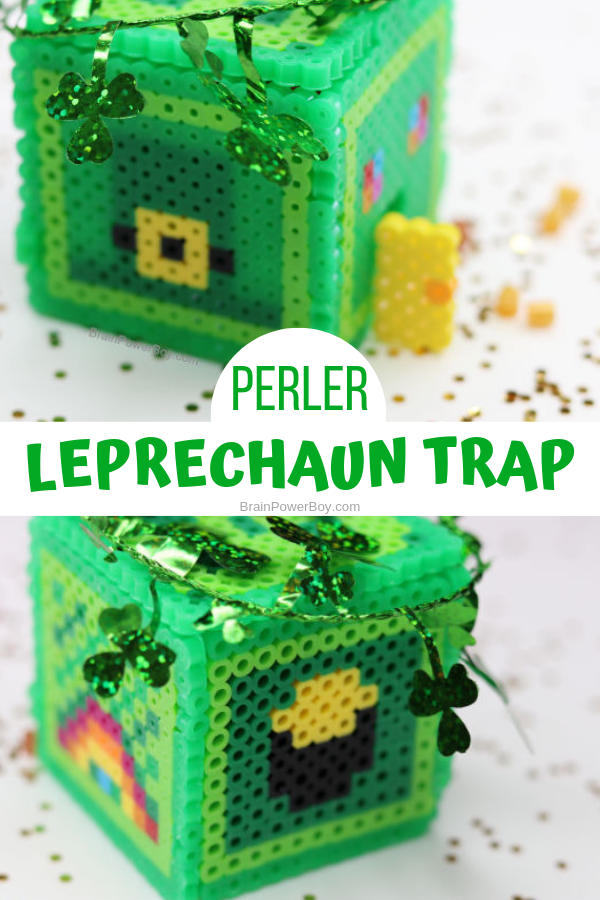
The best part is decorating all of the sides! We used a golden door, a rainbow, a pot of gold, and a leprechaun hat to decorate our trap.
You can use our design ideas or have your kids make their own designs.
Either way the basics of constructing the 3D trap are included in our instructions and in the video below so you should have no trouble helping them to build their own.
This post may contain affiliate links which means I may receive a small amount, at no cost to you, if you make a purchase through a link. All opinions are my own and I share things I think would be of interest to boys.
Perler Bead Leprechaun Trap
I just know you are going to love making this!
Perler Bead Supplies
Here are the supplies needed to create this Saint Patrick’s Day Perler Bead project.
- Three colors of green beads for the trap. I grabbed mine out of here.
- Perler Beads from the Metalic Mix for the beads leading up to the trap.
- Perler Ironing Paper or parchment paper
- Square and round pegboards
- Gold glitter (optional)
- Shamrock garland (optional)
- An iron
- Tweezers (optional)
Note: I always buy Perler brand but you can also get Hama if you prefer.
Visit our Perler Bead Supplies Guide to see our recommended Perler Bead supplies.
How to Make A Leprechaun Trap out of Perler Beads
I am going to share exactly how we made this.
Do use the pictures for guides and also check out the video at the end so you can see how the trap is assembled. I thought it would be much easier to just show you instead of trying to write that all out.
All of the pieces for the trap were made on a square pegboard.
The sides are all the same shape and size. They are 13 beads wide and 12 beads tall. The front piece and the back piece have 3 extra beads in the center which are tabs to hold on the roof.
As you will see in the pictures and in the video, there are tabs to hold the trap together. You do have to be careful when making this and think ahead so you get the tabs in the right places.
Ironing Leprechaun Trap Pieces
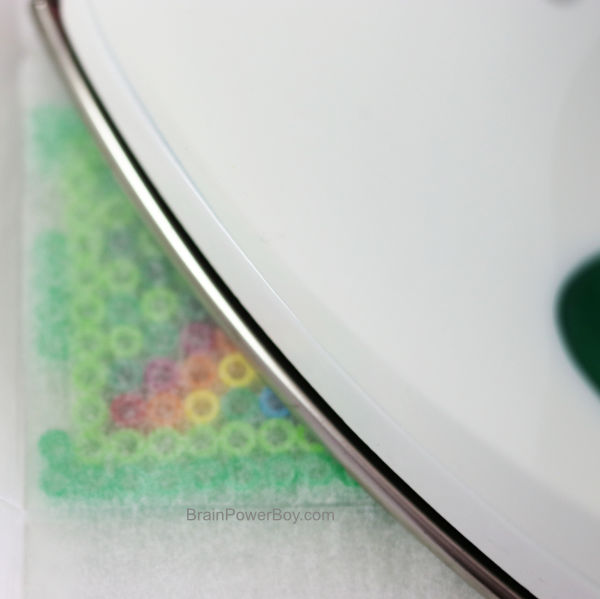
When ironing you need to be careful that you don’t iron the tabs too flat or they will not fit together properly.
After ironing your perler bead walls you must place something heavy on top of them to keep them flat.
This is usually recommended for all projects, but is particularly important for this one. You need flat walls in order to assemble your trap.
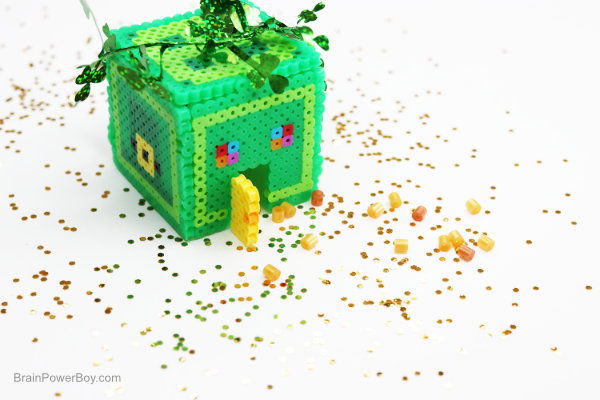
Above is a picture of the completed leprechaun trap.
I’m sure a wee leprechaun is going to find this trap very tempting. When he follows the gold (glitter and perler beads 😉 ) down the path and slips into the door, the door will close and catch him. Once he is caught, as is the rule, he will have to tell us where to find his pot of gold!
Next I will show you each of the sides on the peg boards so you can see how to line up the beads.
The main thing to pay attention to is where the beads are on the edges.
You can decorate the middle parts of the walls however you like, or use our patterns.
Front Door Wall of the Trap
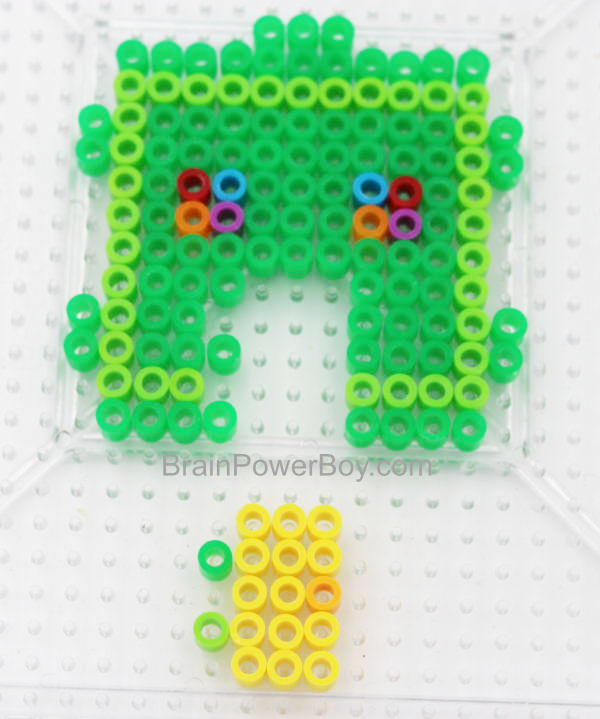
For the front of the trap, I added some rainbow colored windows. I also made a door. The door is 5 beads high and three beads wide. It has a gold handle. It also has tabs on the side so it can be attached open to the front of the trap.
Rainbow Wall of the Trap
Because I was using a square pegboard, I had to make a smallish rainbow but I was pretty happy with the way it turned out. Above the rainbow is a pattern of different green beads. You do you and make it however you wish.
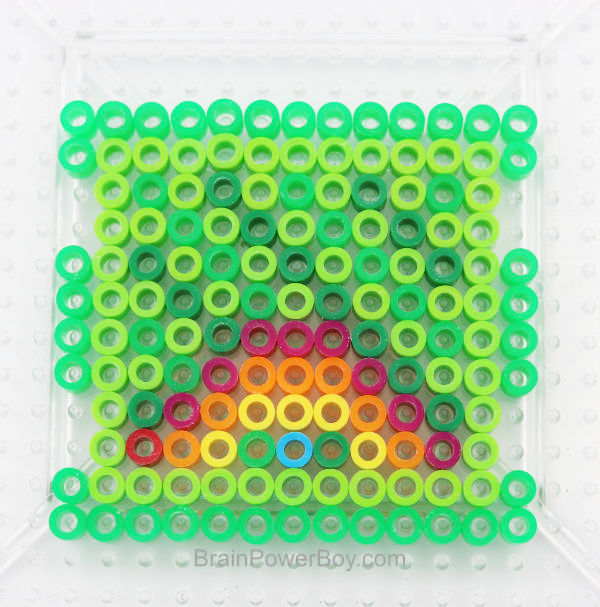
Pot of Gold Wall of the Trap
Of course, I had to add a pot of gold! That really gets the wee folk excited to visit my trap! I found that the bright yellow actually looked better than the gold beads so I went with that color instead.
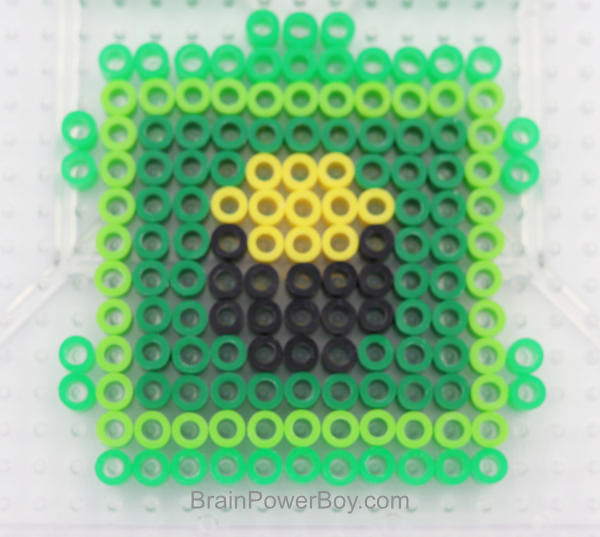
Leprechaun Hat Wall of the Trap
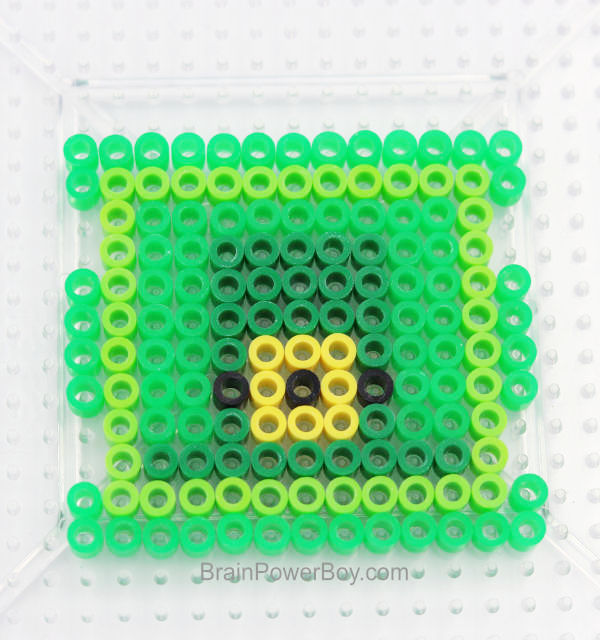
As you can see the leprechaun hat looks fine when on the board. However, once ironed it doesn’t show up quite as much as I would like so if I were to do it again, I would use a lighter green around the hat to make the hat stand out a bit more.
Top of Trap
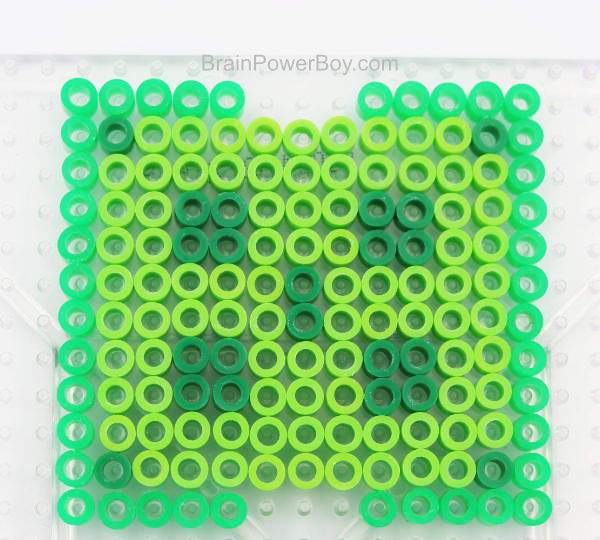
Be sure to leave the open spots at the top and bottom so ou are able to put the top piece on your house. Feel free to make any design you like for the top.
Take a peek at the video below to see how to assemble your trap.
I share the best way to put this 3D trap together and also what to watch out for when ironing so you are sure to be able to assemble it correctly.

I hope you enjoy making this Perler bead Leprechaun Trap! We had a lot of fun trying a 3D perler bead pattern and designing this project.
Need more ideas to try?