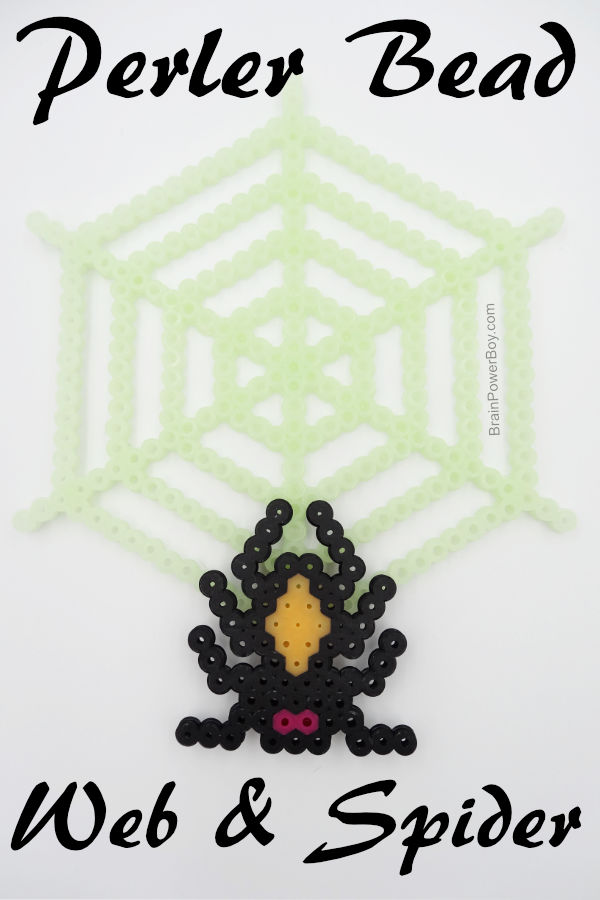
Today I am sharing a fun Perler Spider and Spiderweb that is perfect for Halloween!
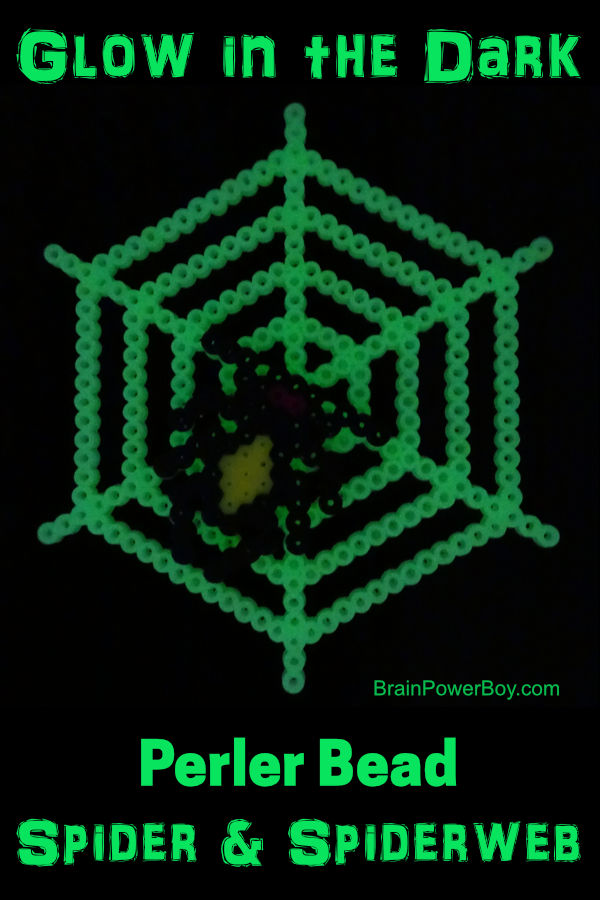
While a Spider and Spiderweb Perler Bead pattern alone is cool enough, we took it to another level by making it with glow in the dark beads for a spooky glow effect! Fun, right?!
I have found I really like designing with Perler beads. You can be really creative with them. I wanted to share this pattern with you as I thought you would enjoy it as well.
Be sure to check out our Perler Bead Pattern page for more fun ideas, including more patterns for Halloween.
This post may contain affiliate links which means I may receive a small amount, at no cost to you, if you make a purchase through a link. All opinions are my own and I share things I think would be of interest to boys.
Spider & Spiderweb Perler Bead Pattern
Perler Bead Supplies:
- Perler Beads in glow-in-the-dark green & orange, black and red.
- Hexagon Perler board
- Perler Ironing Paper or parchment paper
- an iron
For this project we used glow in the dark beads. You can get them in two ways.
- You can purchase separate packages of glow in the dark beads.
- You can purchase a bin of various colors of glow in the dark beads.
Note: I always buy Perler brand as I feel they work the best, are uniform in size, melt the easiest, and give you the best finished product . That are pretty awesome!


- Visit our Perler Bead Supplies Guide to see the best Perler Bead supplies. We picked only the best items for making Perler designs including irons and storage options.
Below I will give you general instructions for making each piece.
Please use the images for reference as well. I find it is easier for kids to look at the picture than read the directions but I am adding them in case they get stuck.
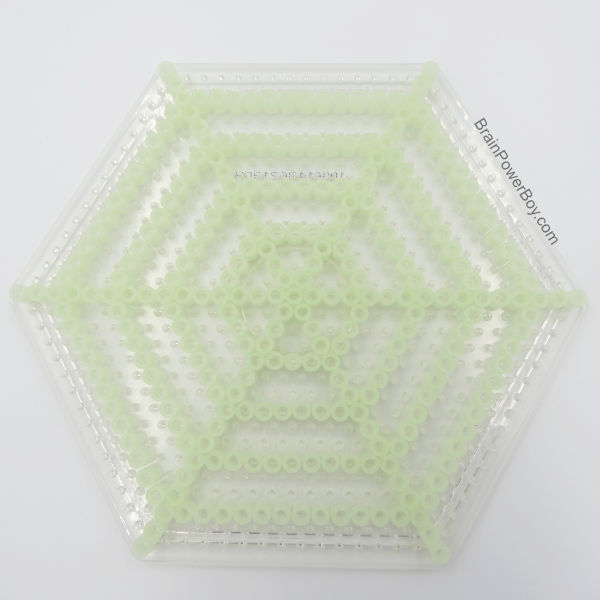
Spiderweb Perler Bead Pattern
This was made on a hexagon board.
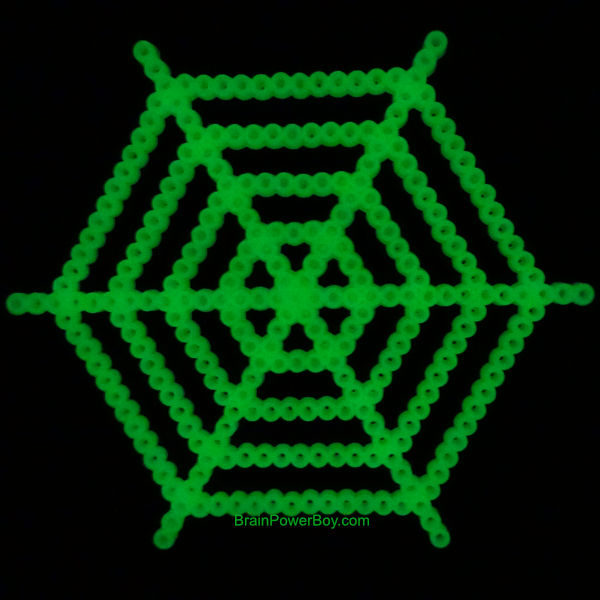
1. The ends of the spiderweb reach all the way to the end of the board and go 31 beads across
2. It is made with entirely with the green glow in the dark beads in the small bag show above.
3. Starting at each corner of the board go in toward the center with rows of beads.
4. Once you have those in place you will start to add in the circles.
5. Counting the center bead, go out 5 beads and make a circle all around the board.
6. Repeat at 8 beads from the center, 11 from the center, and 14 from the center for a total of 4 circles.
You now have your spiderweb design. Iron it and put something down on it to keep it flat.
Next we will make our spider!
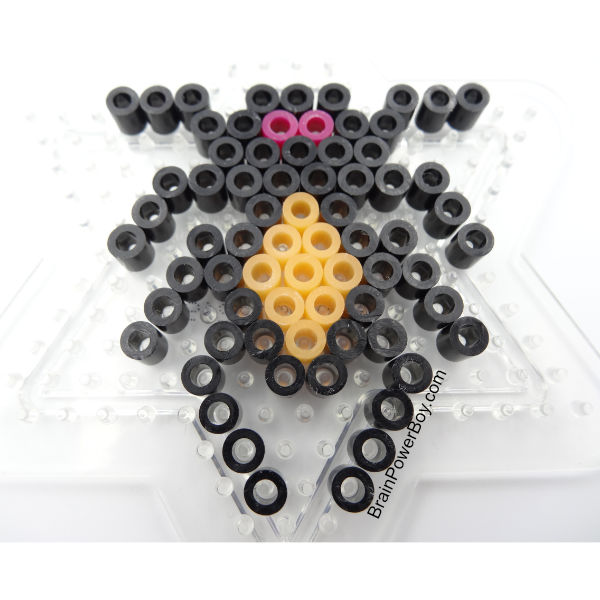
 Spider Perler Bead Pattern
1. This was made on a star pegboard. If you don’t have a star pegboard, grab one here.
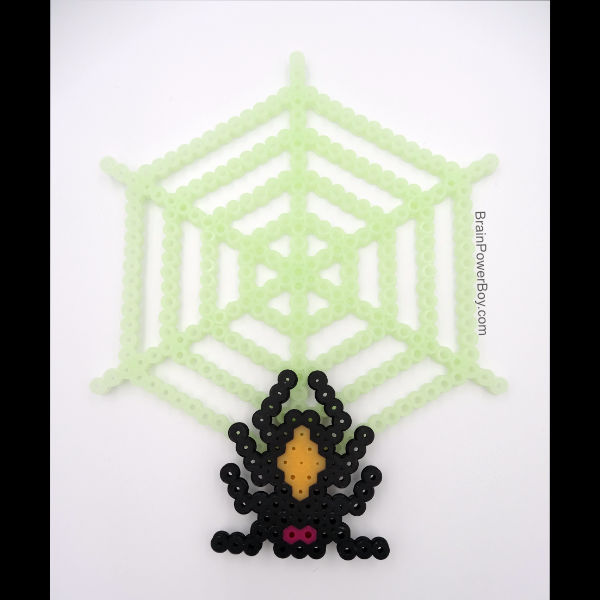
2. I used mostly black beads but also used red for the eyes and orange glow in the dark beads for the abdomen. You could also use red for the abdomen or even the green glow beads.
3. The spider I made is 11 across at the top and 13 beads tall.
4. The abdomen is 1,2,3,2,1 beads.
5. If you like the legs a different way, do it! I tried out a few ideas before settling on this one.
6. Use the picture as reference.
Iron your spider and put something on it to keep it flat.
Spider and Spiderweb Perler Bead Decoration
Next, I thought it would be fun to put them together so we could hang them up.
I grabbed some invisible thread (I’m linking to my favorite brand.)
I was going to use fishing line but it was a bit too thick and you could see it so I decided on the thread instead.
All I did to put it together was:
- Run one piece of thread through the tail end of the spider and even the ends. I leave holes in the beads when I iron. If yours doesn’t have a hole, you can stick a needle through the spot where the hole used to be.
- Tie a small knot at the back.
- Run the two free ends of that thread up just below the center of the web.
- Tie a small knot at the back of the web.
- Cut off any excess tread.
Super simple and the spider looks really neat hanging off of the spiderweb. Especially when the web is glowing.
You could also tie or glue it to the center of the web if you prefer that look.
Activating Glow in the Dark Perler Beads
To the beads to glow like shown in the picture above, put in strong light for a while. Some colors glow better than others, the green we used for the web glows better than the orange we used on the spider.
I am very happy with the green glow in the dark beads as they glow bright and also have a longer glow time than some of the others.
I have an LED light that we use to activate the beads. You don’t need to do that, you can also put them in a sunny spot (not too hot though or your finished project may lose its shape!) or under a lamp.
Conclusion
Thanks for visiting! I hope you enjoy doing this spider and spiderweb Perler bead project. We sure had fun designing it.
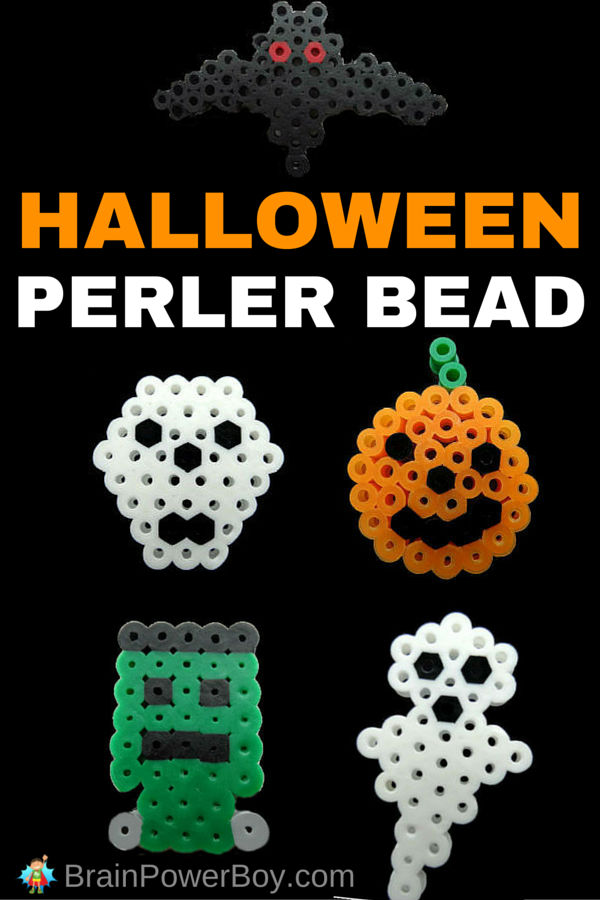
See all of our Perler Bead Patterns for more fun ideas. And don’t miss our other Halloween Perler Bead Patterns.